2.7 Scenes and Sources (Advanced)
Thus far we have used a simple implementation of scenes and sources incorporating only one Window Source and one Audio Source. However, you may want to use multiple sources in a given scene. These can all be configured and arranged on-screen within OBS.
Suppose you want to have the following four sources for your recording/broadcast:
- PDF program to show notes
- Microphone for audio
- Webcam for document camera work
- Webcam for filming yourself
We can set all of these signals up in the same scene. Let’s setup our webcam first.
2.7.1 Setup webcam source
In OBS, add a new source to whatever scene you wish. I will add a “Video Capture Device” to my “Lecture” Scene. You will notice that I click the “Flip Vertically” box because my webcam is mounted upside-down on my tripod. You may not need to select this. If you find out you need to adjust your image, you can always do this later.
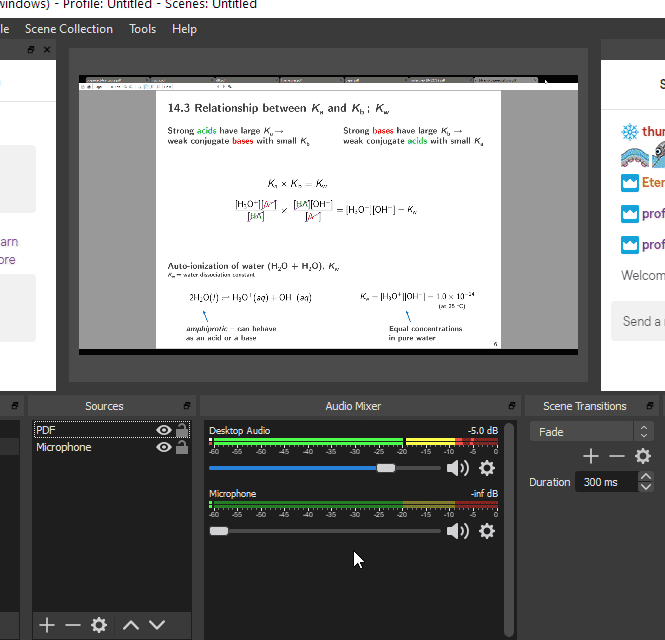
Figure 2.29: Setup your webcam source
Unfortunately, my video feed is still incorrect. I need to mirror it (flip horizontally). You can do this by using the “Transform” menu. Right-click on “Webcam” in your Source list. Navigate to “Transform -> Flip Horizontal”. Looking at the preview screen shows that my video feed is now correct!
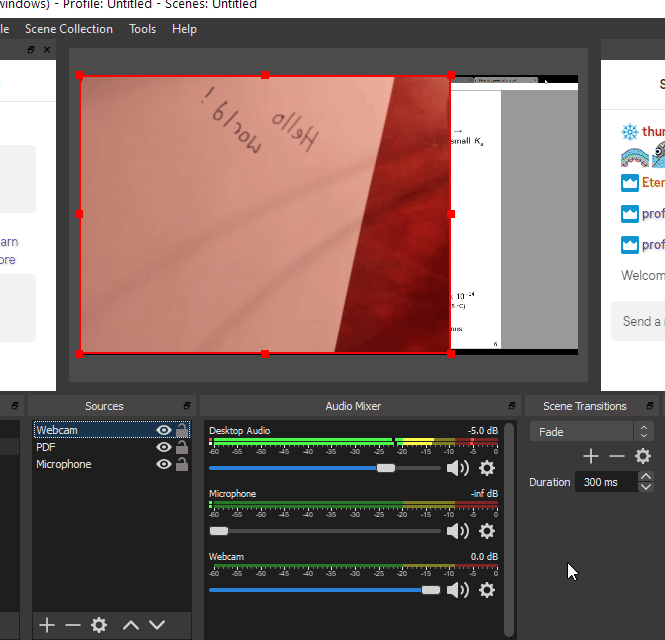
Figure 2.30: Fix your webcam image via Transform
2.7.2 Setup your smartphone webcam
Let’s add a smartphone as another video source. I have DroidCam open on my PC with my phone connected (see Section 4 for instructions on how to set this up). I will title this source as “Smartphone”.

Figure 2.31: Setup your smartphone as a video source
Not the most flattering angle. I’ll re-position my phone on my desk in a bit.
2.7.3 Reconfigure your audio mixer
Currently I have two sources, Webcam and Smartphone, that both have a microphone. It would be unwise to have multiple microphones activated at the same time and can cause for some annoying feedback loops. Let’s choose one microphone source to be active and deactivate the other(s).
Here I will choose my smartphone to act as my primary microphone since it will be placed directly in front of my face. I will right-click on “Microphone”, click “Properties” and configure its default device. I then lower the volume of my webcam microphone in the “Audio Mixer” to zero.
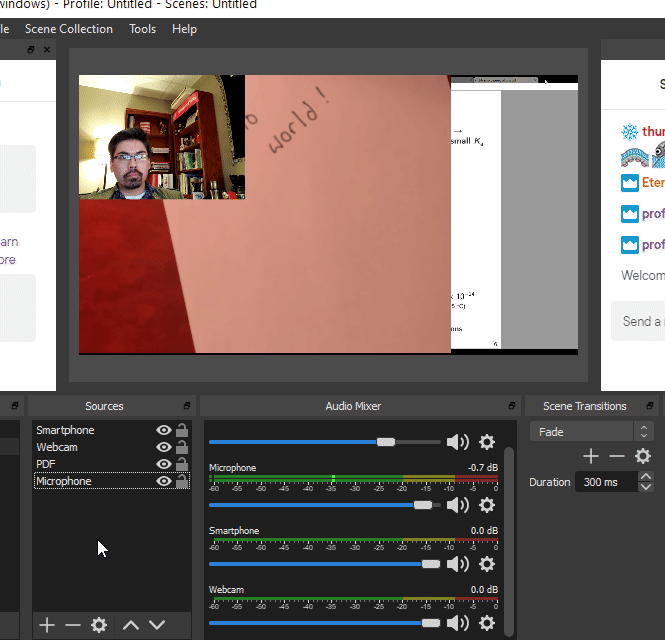
Figure 2.32: Configure your default audio input source
2.7.4 Configure your scene layout
I now have three visual sources in my scene.
- Webcam/doccam video source
- Smartphone webcam video source
- SumatraPDF window source
I can easily organize the layout of these sources on my screen for video recording or broadcasting. All of this can be done in the preview window in OBS Studio.
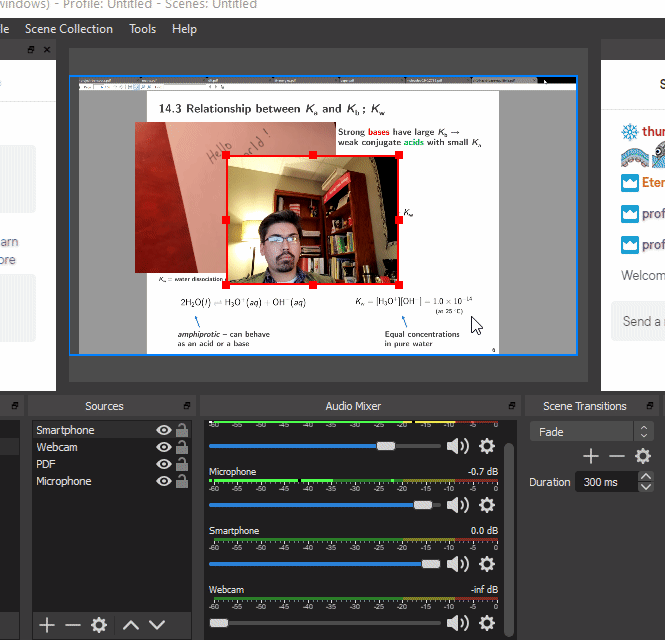
Figure 2.33: Layout our scene
You should notice that each source in the preview window can be re-sized and moved around with the mouse. Remember, whatever is in the preview window will be recorded or broadcasted.
Note: You can modify your scene layout on-the-fly while recording or broadcasting.
2.7.5 Setup your “Be Right Back” scene
You may be interrupted mid broadcast where you have to step away for a few minutes. It is good to let your viewers know that your absence is only temporary and that you will be right back! There are many ways to do this. I’ll show one way here.
First, make an image that has a message on it, such as, “I will return shortly”, or something to that effect. Save the image to your computer. We will select this image to be the source in the BRB scene. I’ve already created my image and will use that for this tutorial.
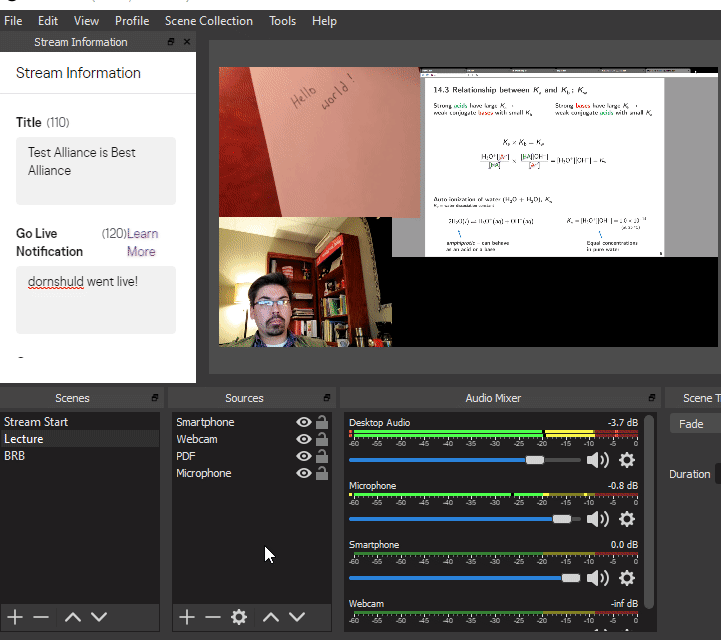
Figure 2.34: Setup an image as a source
Let’s see our scenes in action. Let’s assume I’m in my lecture scene during a livestream. I have to step away from the computer for a few moments. All I have to do is click on “BRB” in my scene list. Watch as the preview window immediately fades into my “Be Right Back” message. Furthermore, you will notice that all microphone sources in the “Audio Mixer” disappear. All microphones are disabled in the “BRB” scene since I did not set any up for that scene.
Figure 2.35: Transition to your BRB scene
2.7.6 Setup your “Stream Start” scene
It might be useful to have a “Stream Start” scene for when you start your broadcast. It is good to give folks a few minutes to get a notification that you are going live on Twitch and connect to your feed. During this waiting period, you could have a message, image, etc. up on your screen. This process is very similar to the “Setup your ‘Be Right Back’ scene” section (above).
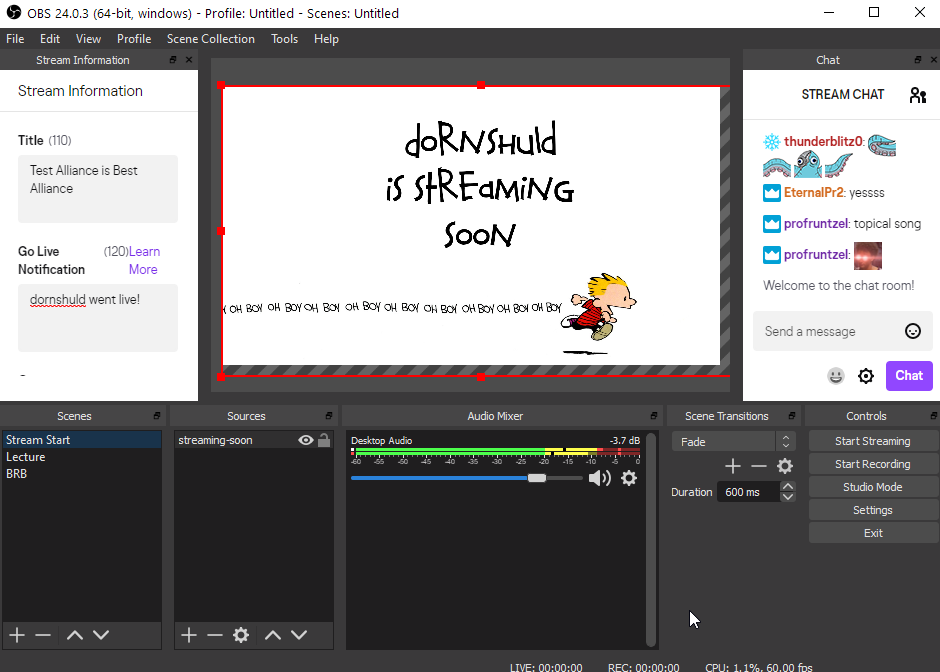
Figure 2.36: Setup your “Stream Start” scene
2.7.7 Include chat stream in video stream
It can be useful to record the chat in your video so later viewers have some context about what is happening in the broadcast. If using OBS, you can do this by using an external solution and integrate it into OBS.
Visit https://nightdev.com/kapchat/ and click “Get It”. Type in your channel name in the top box and click “Generate”. Copy the URL that appears.
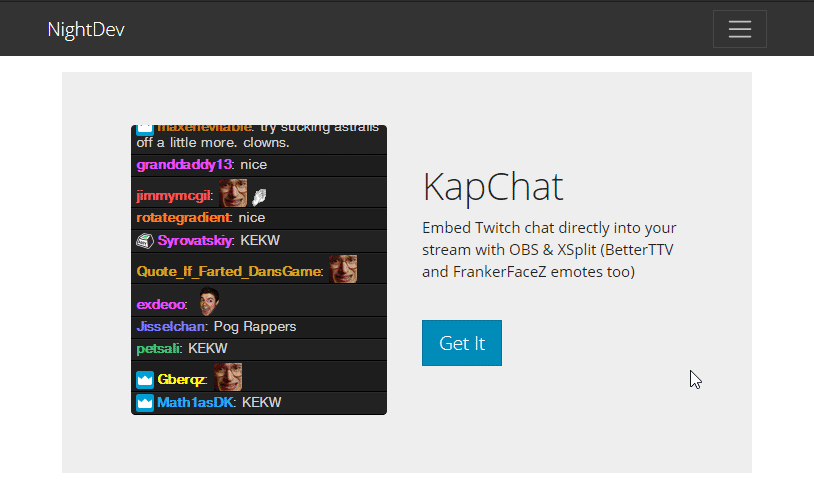
Figure 2.37: Get Chat box URL for OBS Overlay
Next, go to OBS and add a “Browser” source. I’ve entitled my source “twitch chat”.Paste the link given above into the “URL Box”. Assign a width and height of your overlay (in pixels). I suggest an initial width of 200px and height of 350px. You can resize this box later but the aspect ratio will be locked. You can always redefine your width and height by right-clicking on the source and clicking “Properties”.

Figure 2.38: Create “Browser” source and paste in chat URL